xxx
RS3CLN is an exact replica of the original Recel system III MPU which is used in several Recel pinballs from the 70’s.
Dimensions, connections, timings are totally identical.
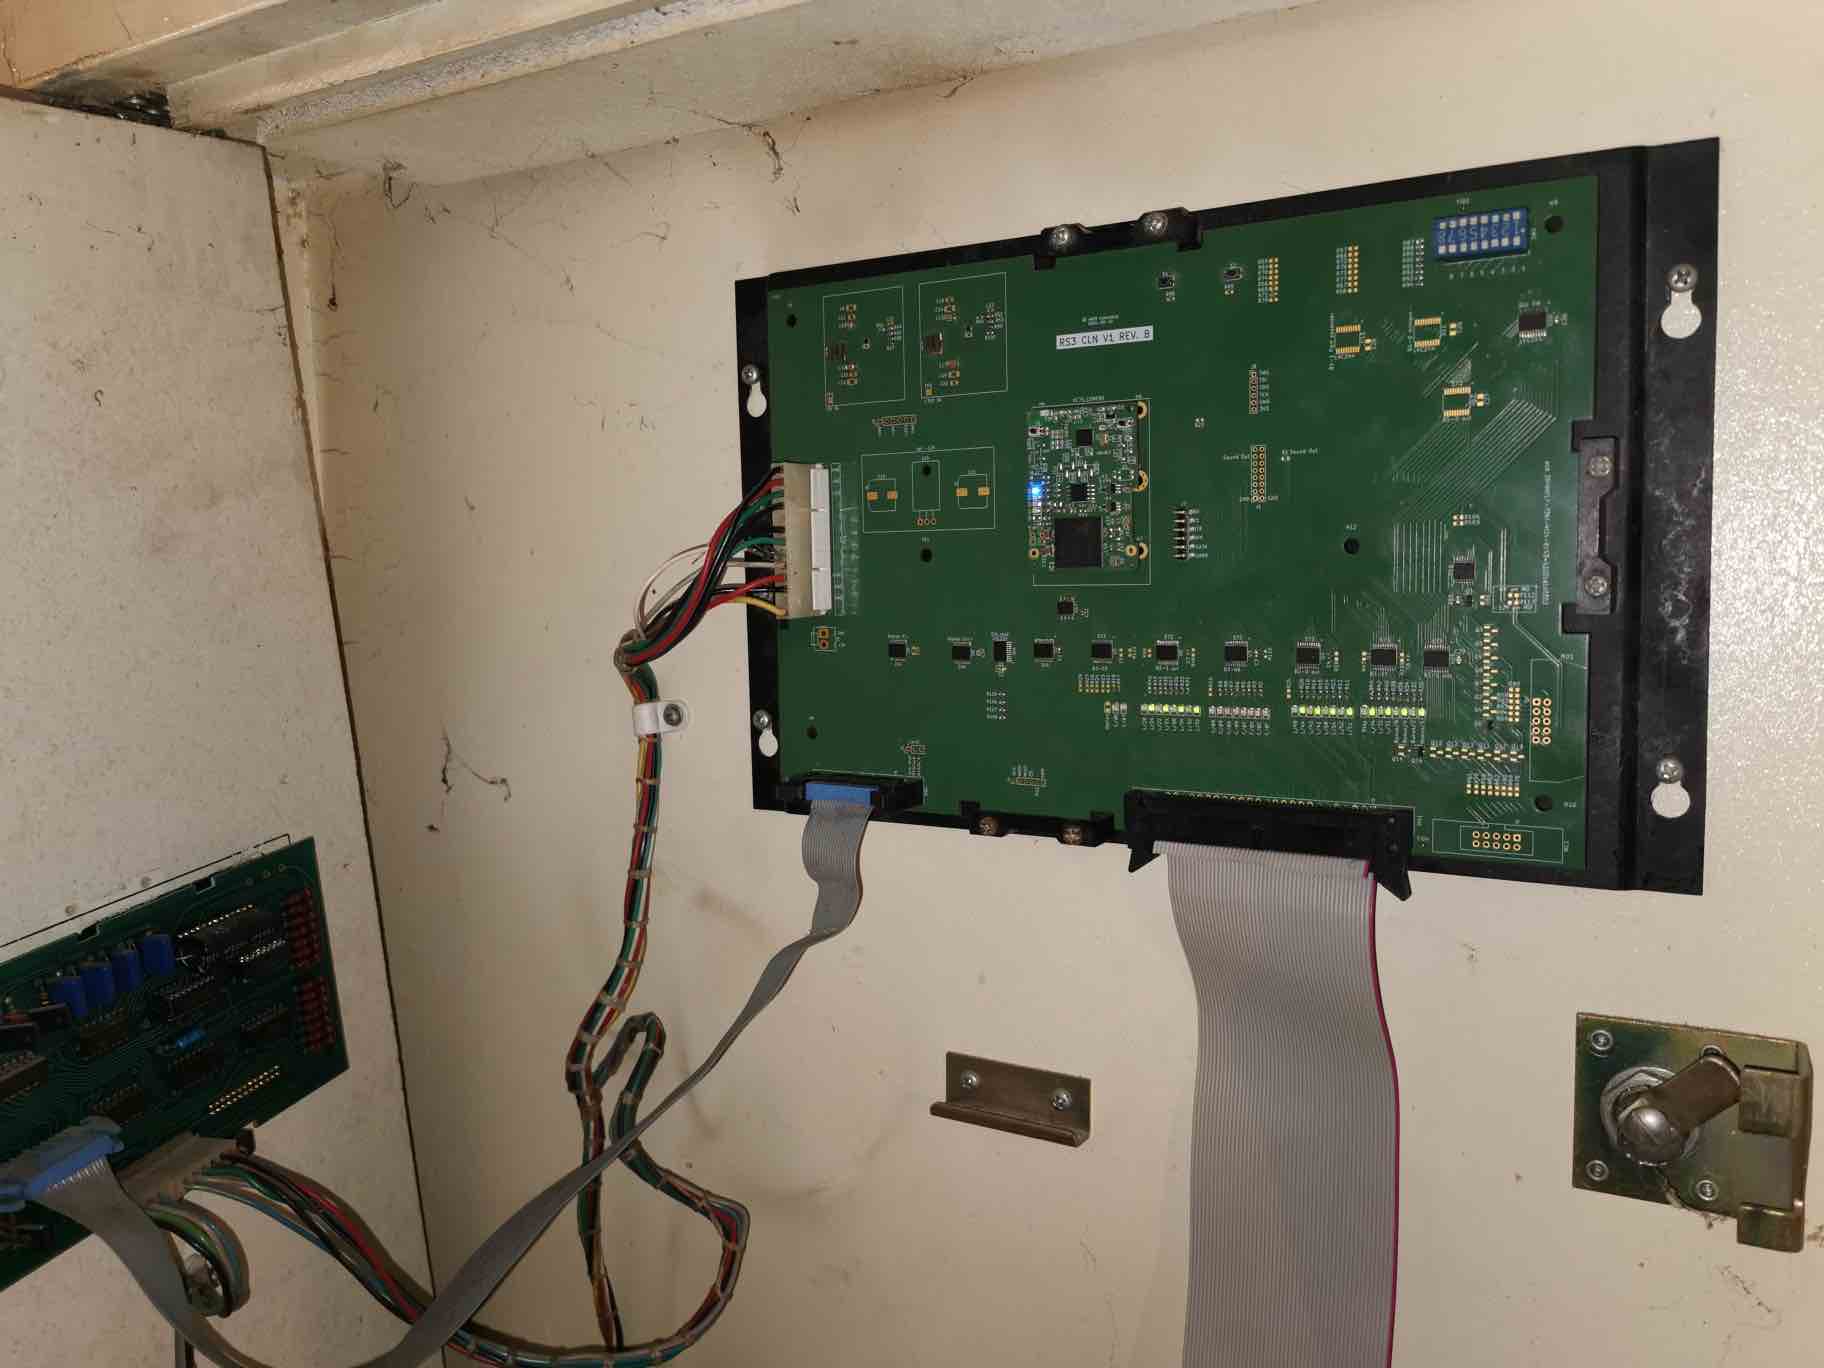
To make it work in a Recel pinball, just disconnect the 3 connectors (PC, MA, MB) from the old MPU and unmount it from the metallic backbone (unscrew the plastic spacers and the power transistors). Then, mount the RS3CLN replacement board in the same way, with the spacers, and reconnect the 3 connectors., PC, MA, MB. That’s it.
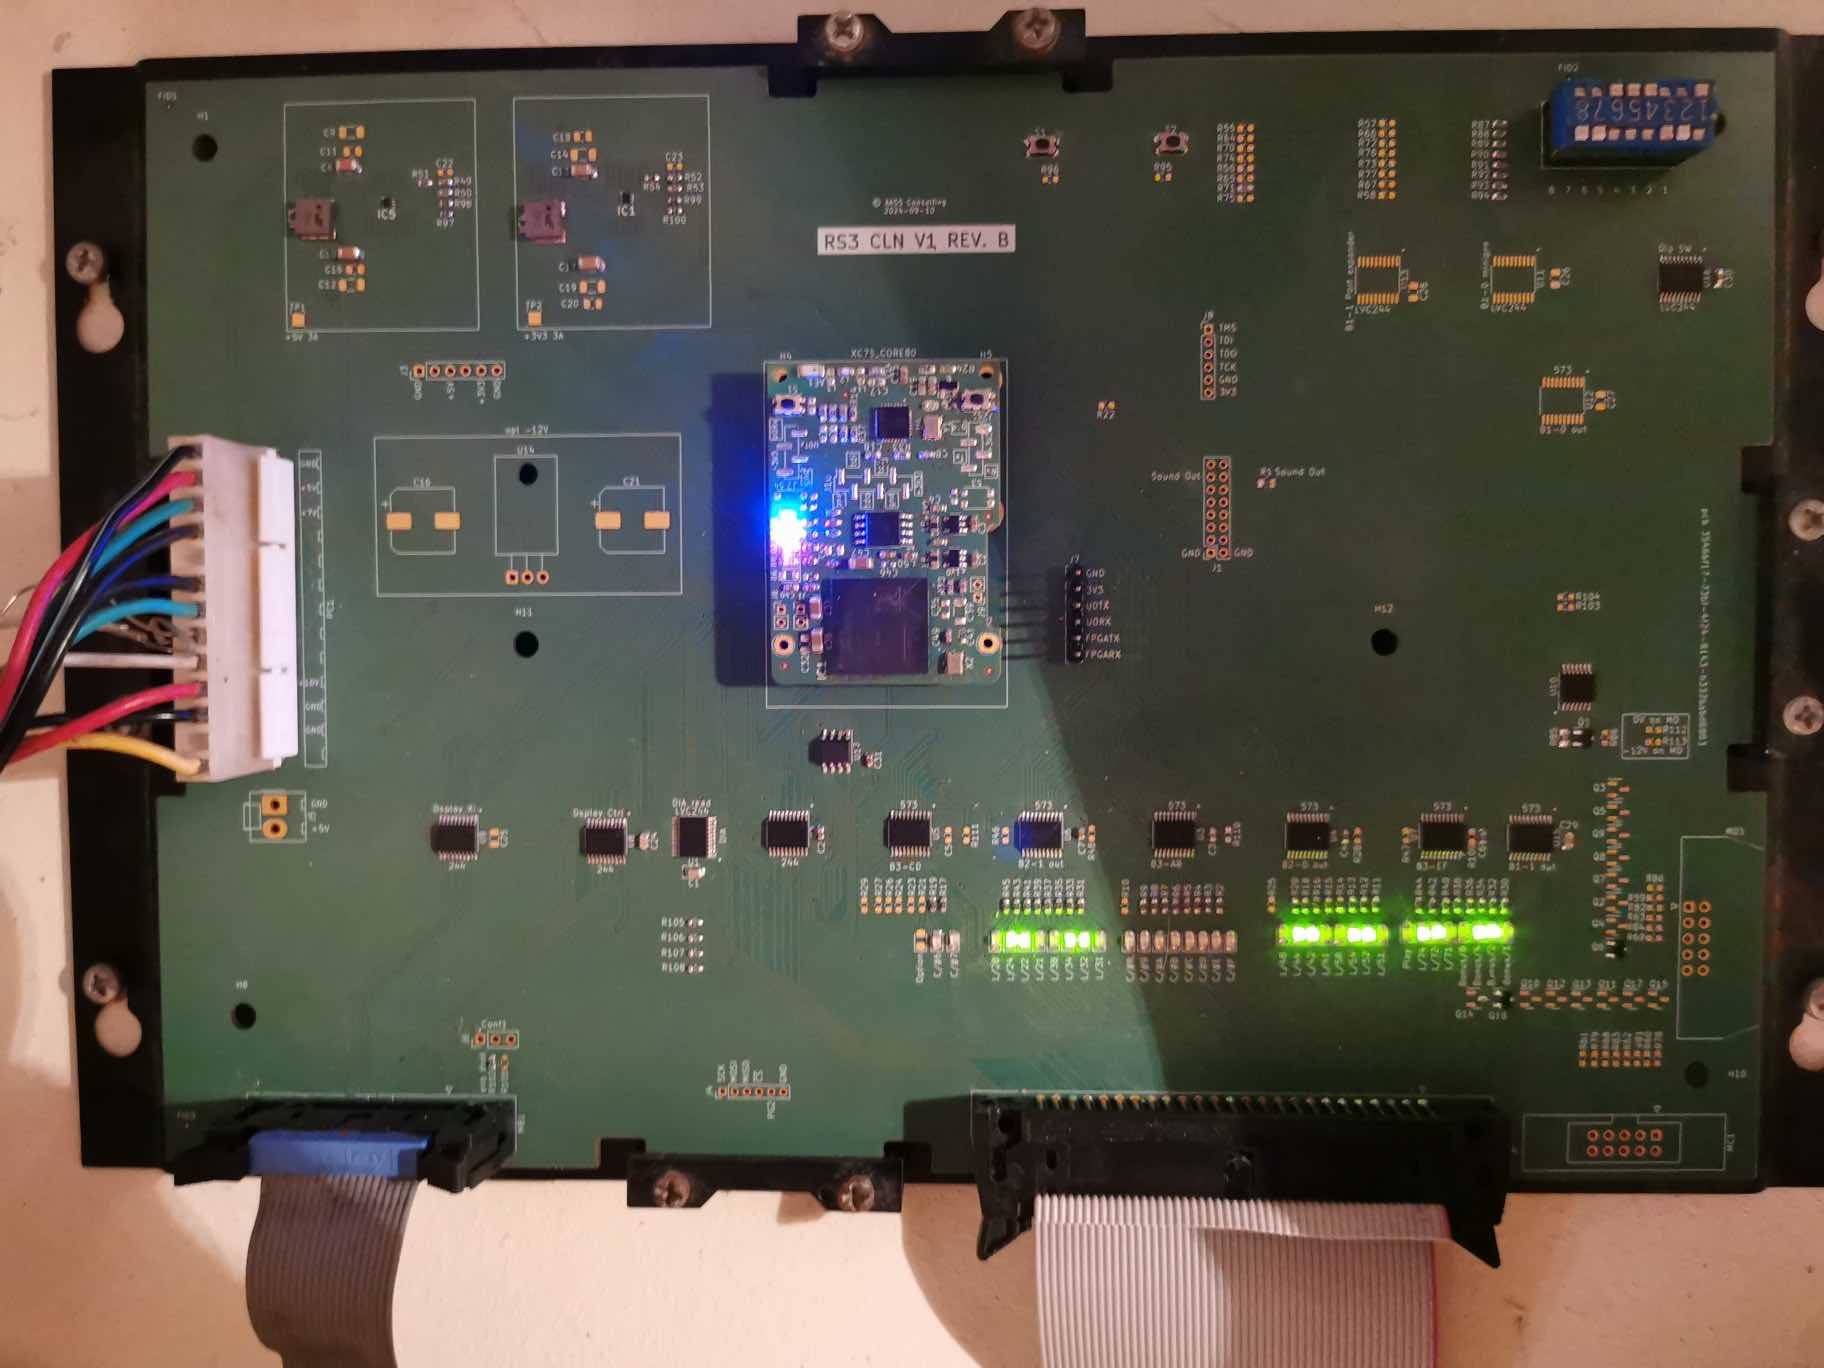
To install an RS3CLN Board in a pinball, please follow the few steps as follows: Check the power connector PC of your pinball. With a multimeter, measure the voltage between pin 10 and GND (pin 1, 11 or 12). You should observe 10V. If the measured value is more than 17V, unstable or negative (with respect to ground), don’t connect the RS3CLN! Turn the pinball off. Connect the 2 connectors PC (Power supply) and MB (Display board) first. Then turn the pinball on and see what’s going on. The red LED of the daughter card should beat peacefully at around 1/2Hz. Yellow LED should be off after 1 second or 2, while the green LED flashes briefly only once at power on. It will flash only when the NVRAM is read or written (corresponding to new game, new ball, ball home, or end of game.) In parallel, you should see the pinball self test starting on the displays of the Lightbox… 11111, 22222… and a series of test codes (just as the pinball was doing with the original MPU). Depending on the current system settings of RS3CLN, the full sequence of test will complete or stop at 2.4.6. or something similar (due to the pinball detecting MA not plugged) It is time to check the system settings and reprogram RS3CLN with the game you want. We assume that Wifi has already been set up. To set-up the wifi of your CoreS7, go to the WiFlip chapter.
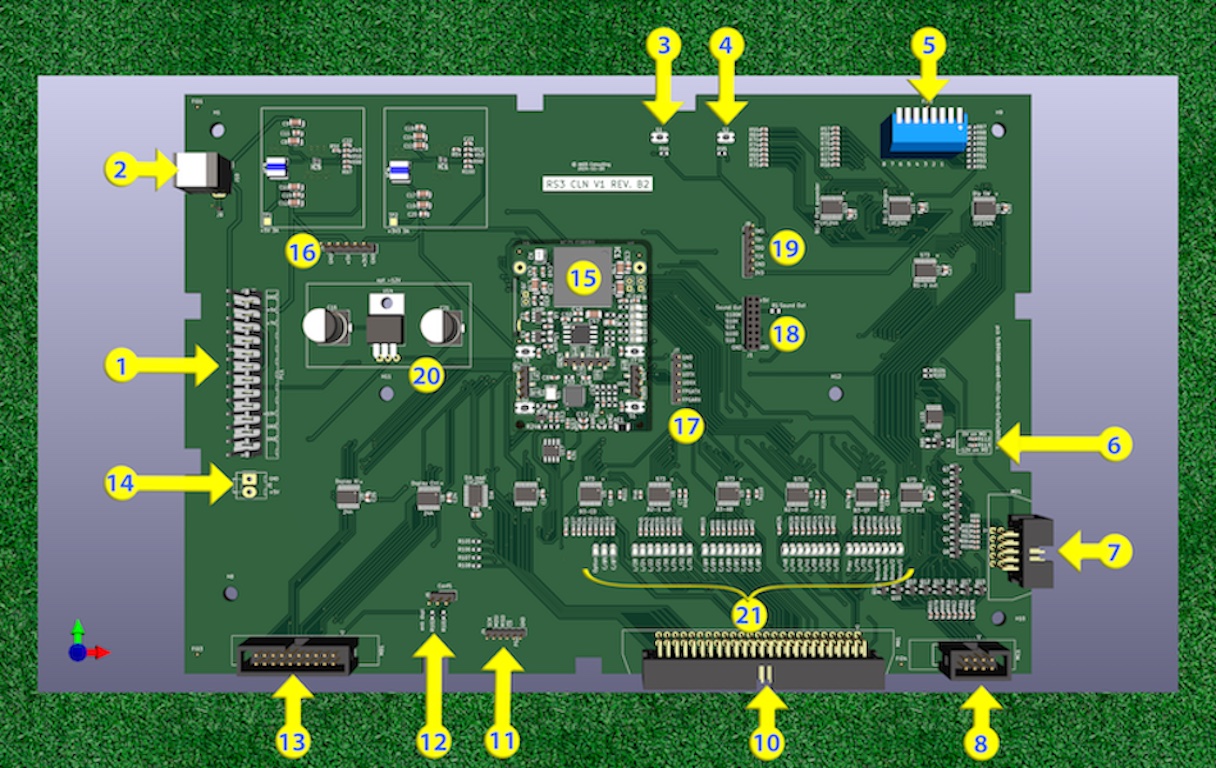
Callouts
Callout | Description | Callout | Description |
1 | PC connector. From cabinet’s power board | 12 | Optional multipurpose IO (3V3) |
2 | [+8V..+12V] standalone power supply | 13 | MB connector. From display board. |
3 | S1. Not always mounted pushbutton. | 14 | Optional 5V supply |
4 | S2. Pinball reset (long press) | 15 | Core80 minicard. Spartan 7 core board. |
5 | 8-Dip switches. Not used yet. | 16 | Power good test connector. |
6 | Select voltage on MD pin 8 (0 or —12V) | 17 | UARTs alternate access (ESP8285, FPGA) |
7 | MD. Miniprinter interface | 18 | Optional sound board interface |
8 | MC. Port expander. | 19 | FPGA JTAG connector |
9 | 20 | Optional -12V power reg. Not mounted. | |
10 | MA connector. Interface with Mux board. | 21 | Output LEDs. Lamps+Coils. |
11 | Optional connection to SPI or I2C |
All system III games are available.
Compatible machines:
The MPU clone is built on the base of a full VHDL model of the original MPU. All PPS4 chips (CPU, 2xRRIOT, GKPD) are modelled and interconnected as they were on the original MPU Board. The whole project is available on GitHub at this repository.
The latest project is in RS3C1B201.src directory.
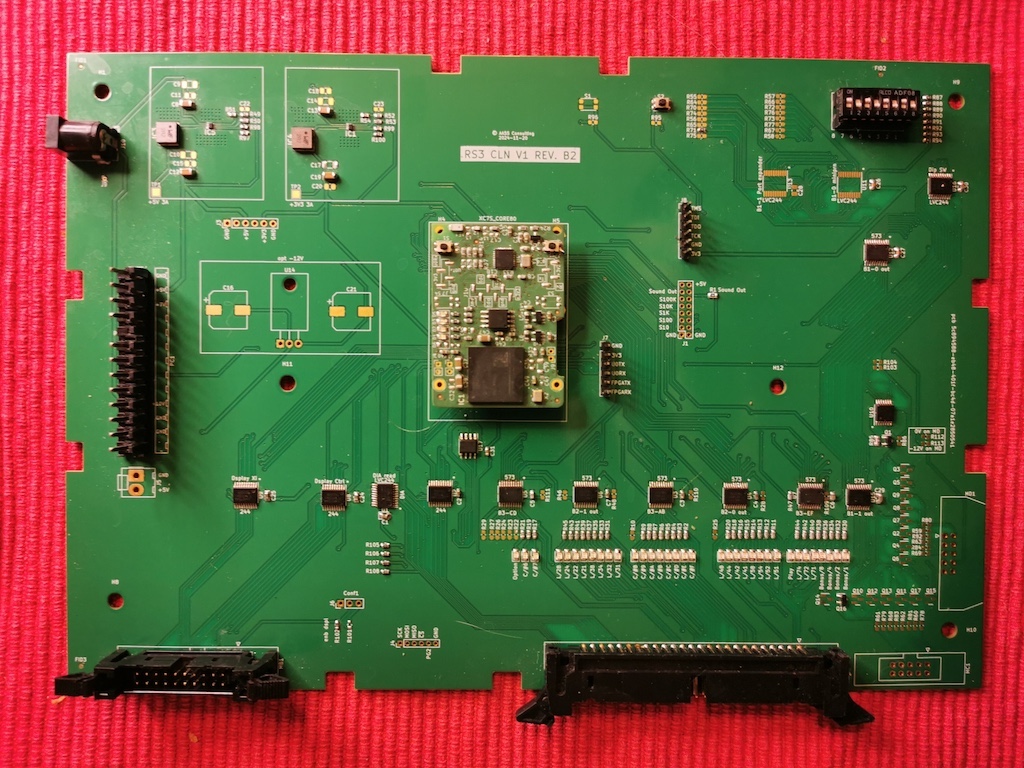
RS3CLN has the same dimensions as the original Recel sys3 MPU, that is 260mmx178mm. 4 pairs of notches allow the users to mount the RS3CLN inside a pinball exactly the same way as the original MPU board. Plastic spacers of the original board can be reused.
| Width (mm) | 260 |
| Height (mm) | 178 |
★ ★ ★ ★ ★
Reviewed in France on 25 April 2025
I have followed the RECEL system III resuscitation project with great interest. It's an ambitious project, which, when it's finished, has produced results beyond all expectations. For years I've been trying to find recel cpus in order to extract components that are nowhere to be found.
So today I'm the happy owner of this new card, and I'm very proud of it. I really admire the recel pinball machines, which unlike the gottlieb of the same era seem to be indestructible and still shine with their distinctive colours and decorations.
I've been lucky enough to have different versions of the card as it has evolved, and it has a relatively intuitive computer interface that is really conducive to managing the game and even troubleshooting. With a good overhaul of all the ancillary cards (driver, display, power supply, etc.), it works perfectly.
The card reproduces the original identically, with self-testing on start-up etc... Programming the game (high score, free play etc...) is much easier with the latest version of the software, because for those who know the original card, the task is much harder.
For me, all this development was titanic, and the designer, Ph, succeeded in making the board more reliable and adding a few new features! Wifi management, control LEDs and remote management of each element. The card adapts perfectly to the old support, it's plug and play pure and simple.
It's a real pleasure to see these machines running, once avoided for their lack of reliability. I'd like to thank the guy a thousand times over, without whom I'd have struggled to bring my crazy race back to life. The service is top quality, always there to listen, and keeps me informed of all the latest developments. It's a real pleasure, and I have complete confidence in them.
If you're looking for the grail, this is the place to find it.
Tristan - Lozère
★ ★ ★ ★ ★
Reviewed in Spain on 10 July 2025
From PinballRR : We want to thank Philippe from pps4 for the Recel System III CPU board. The communication and delivery was perfect. They sent the board already programmed for a Crazy Race, and it was plug and play. No doubt, we will continue working together in future projects.
Best regards and thanks for everything.
Lluis - Spain
Any more questions? Please, use the contact sheet and ask us. We will reply asap: Contact us